Friday, July 22, 2011

Congrats Grad!

We're going to a high school graduation party on Sunday for a friend's son who has been accepted to Syracuse University in Upstate NY.  I knew I wanted to use my fave VW Beetle image from Hero Arts clear set CL478 Going and somehow represent the journey from high school to college:

I die cut the "high school (h.s.)" from Cricut Winter Woodland cart and stamped it with Hero Arts S5216 Grid Pattern.  The "road signs" were made by attaching the stamped "To" and "From" arrows from the Hero Arts CL478 Going set to signs die cut from Cricut Walk in My Garden cart.  The die cut SU letters were stamped with Papertrey ink's Background Basics Gingham to give them a little texture.  The cute sun was a free printable from Hero Arts.   I embossed the grad cap from Vap! Scrap twice and popped up the top with foam tape for some dimension. 
Other Materials Used:  Papertrey ink cs and cloud dies, MFT grass border die, Cuttlebug embossing border folder (for the "road"), Big Lots alphabet stickers, Making Memories silver and black brads, Stampin' Up cs and ink, Bo Bunny pp

Temps were in the high 90's again - another perfect day to stay inside and stamp :)

Wednesday, July 20, 2011

50 and Fab!

It's my sister-in-law Sue's 50th birthday this Friday. I really hate all that "Over the Hill" stuff and black balloons they sell to supposedly commemorate someone's 50th birthday.  Here's the card I created for her:


Not one bit of stamping!  I used Cricut Summer in Paris cart to die cut the silhouette female and Storybook cart for the letters.  I found the little K & Co purse embellie at Big Lots awhile ago. 
Other Materials Used: Papertrey ink cs, Stampin' Up scalloped border punch, Source of pp unknown

My sister-in-law has raised two of the most delightful young ladies - Kelly will be a senior at Clemson University this Fall and Katie will be a senior in high school.  She opens her southern home to her mother for 4 months out of the year so my mother-in-law doesn't have to endure the harsh upstate NY winters.  She cheerfully altered her family's eating and exercise habits when her husband's doctor discovered some medical issues.  And during a recent visit she gave me a gift certificate she'd won as it could be used at their local stamping store.  Fabulous indeed!


Tuesday, July 19, 2011

Bring on the Girly Stuff!

I really needed a break from making "manly" cards :)  My dear enabler - er, I mean friend - had an extra Michael's coupon and offered to pick me up this Flower Fields stamp (P116) by Stampendous I've been eyeballing for awhile.  And one of my sweet Flickr friends Joy provided the perfect inspiration to create a card with it.  I really love the sunshine colors Joy used in her card and the way the sentiment was placed over the flower stems.  Here is my take:


I colored the flowers with copics and popped up the largest bloom.  The butterfly is from my favorite Hero Arts clear set CL383 Antique Engravings.  The sentiment is from an old Plaid set.
Other Materials Used:  Hero Arts Sunshine layering paper, Papertrey ink cs, Queen & Co pearls

My mom asked if I could make her a thank you card and since my Flower Fields stamp was still sitting on my craft table I decided to use it again:


This time I stamped the image twice and colored the flowers with a prisma and the leaves with copics.  I recently attended a Stampin' Up workshop and the sentiment is part of a set I won as a door prize!  I really like the whimsical font.
Other Materials Used:  Stampin' Up cs, pp and butterfly die, Nestie ribbon slide label, K & Co gem, Michael's ribbon

We've been having outrageously hot and humid temps with no relief in sight.  I must confess I like having the excuse to sit inside with the cool air conditioning and to surf everyone's blogs,  to comment on flickr and to create!  It's so difficult to strike a balance sometimes, isn't it???  When I can't create and be as active on-line I don't like it but I also don't want to sit on life's sidelines either :)


Sunday, July 17, 2011

Inspired by a Car Show

Over the weekend I braved the 90 degree weather to attend a car show with my dh.  After spending 6 hours looking at literally thousands of cars I decided this must be how my dh feels when he gets stuck coming with me to a stamping store -LOL!

I have to admit I was quite impressed with the workmanship that goes into restoring these old vehicles.  So much so that I was inspired to create a card based on this one:

Don't you just love this color combination?  And doesn't the front end look like a face?  Wonder what it would it say if it could talk :)

And here is my card:

I used the classic car image from Hero Arts clear set CL478 Going and colored it with markers.  I used a silver gel pen on the chrome parts (hard to see in the pic) and I tried to make the matting look like an old polaroid photograph.  Wasn't sure about the "road" but thought I needed to somehow ground the car image.
Other Materials Used:  Papertrey ink cs, Stampin' Up sentiment, Cuttlebug embossing folder, Source of pp unknown, Provocraft punch, photo corners

Took lots of pics and thought I would share some of my faves.   Can you imagine cruisin' in this beauty to the drive-in? :


Somehow I don't think this is the car's original paint job! :

This electric blue was dazzling!  But I keep wondering how anyone can see out those tiny windows well enough to drive! :


And lastly I found something very endearing about this old school "Rat Rod"!  :

Thursday, July 14, 2011

Mandatory Manly Stampin' Stuff

Summer in my family means mandatory manly stampin' as my brother and his two sons Scott Jr. and Stuart celebrate their birthdays in July and August.  Thank goodness I picked up a copy of the Stamp It! Cards vol. 8 issue as one of the cards featured on page 67 inspired me to introduce myself to some of the other images in Hero Arts CL478 Going set.  I wanted this set just for the VW Beetle image and I've completely ignored the other stamps until now :)


I followed Becky Lillibridge's design pretty closely except I used the truck instead of the motorcycle image, used a sentiment from Hero Arts CG275 Birthday (4) and added a birthday "balloon".  My brother Scott owns a very "manly" blue truck so I think he'll appreciate this.
Other Materials Used:  Stampin' Up cs, Ranger faded jeans distress ink, VersaFine toffee ink, Hero Arts S5507 Envelope Pattern, Making Memories brads, Hemp, Cricut George and Basic Shapes cart (balloon die cut)

My nephew Scott Jr. is an ex-Marine currently working as a civilian in Kuwait. He's got some vacation time coming so I'll be able to give him his card in person next month:


This time I embossed the sentiment and used a Cuttlebug embossing folder to make the background.  I really like this color combination for a masculine card - the embossed piece is Papertrey ink's ocean tides cs.

Two manly cards down, one to go!  Thought I'd share my favorite pic of the two boys:


They are close in age and have been sooooo competitive all their lives.  Here they look genuinely happy to be in one another's company!  As they've gotten older their presence at family gatherings is no longer a given and I miss them....

Thanks for stopping by!  Your comments truly make my day!

Thursday, July 7, 2011

A Trip to the Zoo


Today was my mom's birthday and it also happened to be the day the assisted living facility where she lives had planned an outing to the zoo.  And since there was room for one more they let me tag along :)

Look at how bored and grumpy this orangutan looks:


But look what happens when he finds himself with an audience!  Hee!

This pair of rhinos look as dry and dusty as the ground where they're resting.  Did you know they are hunted senselessly for their horns only?  Their meat and hides are left to rot.

They say cats sleep for at least 20 out of the 24 hours in a day.  At least this snow leopard lazily opened her eyes for the camera!

You can see why the staff at the zoo have nicknamed this seal "Flounder":

And lastly here's a pic of the birthday girl - I think her smile says it all!

So incredibly thankful for days like these :)

Thursday, June 30, 2011

When Was the Last Time You Used Pinking Shears?

I've had this idea for a congrats card for a new baby girl all month and finally put it together today:


The die cut onesie is from Cricut New Beginnings cart.  I stamped it with this cute sentiment from studio g I found in the $1 bin at AC Moore.  The background was stamped with Hero Arts S5215 Clouds in Color Box french blue ink.  The sun and tiny clothespins are images from Hero Arts CL439 Kiss From the Sun clear set.  I happened to notice my pinking shears collecting dust while hanging from my craft room wall and thought I should put them to good use making some grassy hills:)
Other Materials Used:  Papertrey ink cloud die, Cuttlebug swiss dot embossing folder, Martha Stewart baker's twine, Oriental Yrader button, Stampin' Up cs and pp.

Now if only one of our nieces or nephews would cooperate and give me a reason to need this card...........:)  :)   :)

Friday, June 24, 2011

His & Hers

This fun patterned paper from American Crafts immediately made me think of the chairs in Hero Arts clear set CL480 Wish You Were Here so of course I had to buy a sheet :)


I embossed one of the chairs from this set on the solid red reverse side of the pp, cut it out and mounted it on a swiss dot embossed circle.  The sentiment from the same set was stamped on a thought bubble I die cut from Cricut George and Basic Shapes cart and adhered to the card front as shown.
Other Materials Used:  Martha Stewart baker's twine, Stampin' Up cs and ink, Nestie, Cuttlebug swiss dot embossing folder

I didn't stop there!  A cute anniversary card featuring His & Her towels in Card Creations Volume 9 page 17 inspired me to create this card that could be used as either an Engagement or Wedding card:


The sentiment from Hero Arts set CL342 Everyday Sayings was embossed on a piece of vellum and attached to the card front with brads.  I found the His & Hers letter stickers at Dollar General.  The "rug" was made by die cutting an oval from Cricut George and Basic Shapes cart and snipping the edges with scissors to create "fringe".
Other Materials Used:  Stampin' Up cs, pp, vellum and ink, Making Memories brads, Nestie, Cuttlebug swiss dots embossing folder

Thanks for all your sweet comments!  Hope everyone has a wonderful weekend :)

Monday, June 20, 2011

Dots & Flowers

This card finally made it to the birthday girl over the weekend so I can share it here:


I was totally inspired by this patterned paper from "the girls' paperie".  I die cut the dress form from the dotted reverse side of the striped paper.  The button card is a copy of a vintage one that I printed out on cream colored cardstock and then distressed with Ranger antique linen distress ink.  I glued the pink vintage reproduction buttons to it before adhering it to the card front.  I found the Wilton pink paper doily in a Walmart clearance aisle.  When I was putting the card together I thought it was missing something so I added the die cut paper ric rac that my sweet flickr friend Anita sent to me - I think it's just what the card needed :) 

Not a whole lot of stampin' going on but this was a fun card to put together. My dh blames the birthday girl Allysa for what he refers to as my "papercrafting addiction".  Since she's also responsible for introducing me to Zumba I like to joke around that if it wasn't for her I wouldn't have any hobbies :) 
Other Materials Used: Martha Stewart baker's twine, Rubber Stampede Sentiment, Stampin' Up ink, Cricut cart Summer in Paris (dress form die cut), Cricut cart George and Basic Shapes (label die cut)

Hope everyone is having a great start to their week!  Thanks for stopping by and for your comments!

Friday, June 10, 2011

Watercolored Flowers

I put together another card with a panel I stamped the other day using a watercolor technique:

The grass from Hero Arts CL428 Earth Flowers was inked with Ranger peeled paint distress ink and then spritzed with a mix of perfect pearls and water before stamping on a piece of watercolor paper.  The weed from Hero Arts CL185 Elegant Weeds was inked with a Stampin' Up rich razzleberry marker and spritzed as above before stamping.  It's difficult to see in the photo but I also stamped Hero Arts S5507 Envelope Pattern with Ranger antique linen distress ink on the sentiment circle and distressed the whole thing with the same ink.  Sentiment is from Hero Arts CL342 Everyday Sayings. 
Other Materials Used:  Stampin' Up cs, pp and butterfly die, Nesties, Queen & Co. pearls, Cuttlebug swiss dots embossing folder, Basic Grey pp (butterfly)

I took my mom and her cat to the vet yesterday as she had made the painful decision to put Cali (short for Calico) to sleep.  I'm going to be honest - there was no love lost between me and Cali.  I don't have enough fingers and toes to count the number of times Cali tried to bite me!  But for 12 years Cali was good company for my mom and for that reason alone my heart aches for my mom.

Wednesday, June 8, 2011

I'm Blaming it on the Weather!

I've been nonexistent in blogland for a few weeks and I'm blaming it on the weather!  Summer in upstate NY is sooooo fleeting that when it does finally arrive you grab on with both hands!  And to make matters worse I don't own a laptop.  After spending months and months this winter cooped up in the house I have a hard time sitting inside when the sun is finally shining outside. 

Yesterday I was inspired by the flowers blooming around my patio.  I took some watercolor paper, stamps, distress inks and a water mister outside and tried to re-create some of the beauty surrounding me:


 Hero Arts S5316 Silhouette Grass was inked with Ranger peeled paint distress ink then misted with a mix of perfect pearls and water before stamping on a piece of watercolor paper.  Using the same technique I stamped one of the flowers from Hero Arts CL428 Earth Flowers in dusty concord distress ink and the single flower from Hero Arts CG170 Wildflower Garden in spiced marmalade distress ink.  I love how unpredictable the results are when using this watercolor technique and was really pleased with how this turned out.  My dh, on the other hand, asked why the flowers looked like blotches........*sigh*
Other Materials Used:  Hero Arts PS621 Sunshine Layering Papers, Hero Arts CL342 Everyday Sayings (sentiment), Stampin' Up pp, butterfly dies and vellum, Queen & Co. rhinestones

Thanks for stopping by!

Monday, May 23, 2011

Celebrate!

It's our niece Katie's birthday on June 6th and since she lives in South Carolina I needed to get her card done so we can mail out her package this week.  Katie is definitely a "fashionista" so when I saw this patterned paper collection by sei called "Couture" I knew it would be perfect!


After stamping the dress form and hat from a clear set by Toga with Clearsnap seaglass pigment ink, I overstamped both images with Hero Arts S5507 Envelope Pattern with Ranger antique linen distress ink to give them a little texture.  After cutting both images out I also inked their edges with the same distress ink.  The sentiment that I embossed on the banner is from an old Rubber Stampede set - I love this funky font!  I used a Martha Stewart punch and a Stampin' Up die to create the layered butterfly.  The individual and flourish rhinestones are from Michael's.  The paper flower was a gift from a friend :)
Other Materials Used:  Stampin' Up cs 

I hope everyone is having a fabulous start to their week!  I want to thank you for sending positive thoughts my mother-in-law's way.  Her surgery to remove the gallstones was successful and she is feeling soooooo much better :)  I'm off to spend some time with my mom today - we're going to do a little shopping and have lunch at Olive Garden (Yum!).

Tuesday, May 17, 2011

Making ATC's is Addicting!

After seeing Jennifer McGuire's post today on the Hero Arts blog I just had to try this technique!  One of the themes of this month's Hero Arts contest is ATC's so I decided to use Jennifer's technique to create a couple:


For the first one I stamped Hero Arts CG140 Poppy Background with ColorBox frost white ink on a piece of kraft cs.  After coloring the flowers and stems with colored pencils I overstamped Hero Arts CG125 Friend Definition with cocoa ink.  I mounted the panel on a 2.5" x 3.5" piece of chocolate brown cs and then embellished it with some die cut butterflies and baker's twine.
Other Materials Used:  Stampin' Up butterfly die, cs and ink, Martha Stewart baker's twine, Papertrey ink cs

For the second one I followed the same process above using Hero Arts CG105 Silhouette Flower and Hero Arts K5193 Flower Word.  The hummingbird from CL383 Antique Engravings was stamped on kraft cs and colored with colored pencils.  I embellished this one with a die cut fence border and butterflies.
Other Materials Used:  Stampin' Up butterfly die, ink and cs, Martha Stewart fence border punch, Papertrey ink cs

They were so much fun to make that I decided to make two more!:


I inked up one of the leaf clusters from Hero Arts CL477 Delicate Leaf Clusters with Ranger distress inks (peeled paint for the first and tumbled glass for the second one) and spritzed with a mixture of perfect pearls and water before stamping on pieces of watercolor paper.  They have a pretty shimmer IRL that was hard to capture in the photo.  Both sentiments are from Hero Arts CL129 Anytime Messages.  I inked the edges of the panels with Ranger antique linen distress ink before mounting them on 2.5" x 3.5" pieces of cs.  The dragonfly is from Hero Arts CL383 Antique Engravings and the die cut butterfly is a Martha Stewart punch.
Other Materials Used:  Stampin' Up ink, cs and pp, Queen & Co. rhinestone, Martha Stewart baker's twine, Ranger icicle stickles

Thanks for all your sweet comments!

Sunday, May 15, 2011

Vintage Thinking of You

I wanted to make a special "Thinking of You" card for my mother-in-law as we are all praying the procedure she's scheduled to have on Friday will finally remove those pesky gallstones!  I also wanted to use some new stampin' goodies I recently acquired :)
I stamped E2409 Blossoms I from Hero Arts set LL754 Blossom Etchings (my very first Hero Arts stamps!) on a die cut oval and colored it with some of my new copic markers from the Pale Pastels set.  After masking the blossom I overstamped Hero Arts K5344 La Letter in cocoa ink then sponged the whole oval with Ranger antique linen distress ink.  I then mounted the floral oval to an amethyst die cut oval that was embossed with a Cuttlebug swiss dot embossing folder.  I framed the completed piece with my new Spellbinders Decorative Oval Window die cut that was distressed with both Ranger antique linen and walnut stain distress inks - love how this looks like an antique frame!  Sentiment is from Hero Arts CL342 Everyday Sayings.  I was going to add a ribbon treatment until I came across this netting and vintage-looking button - different, but I like how it looks :)
Other Materials Used:  Martha Stewart cs, Stampin' Up cs, ink, pp and flourish stamp

Thanks for stopping by and for all your comments!

Saturday, May 14, 2011

Not Breathing a Sigh of Relief

Awhile back a poem was making its rounds on the e-mail circuit.  I don't remember all the words exactly but the gist of it was about the kinds of people who cross your path in life.  Some of those people end up being kindred spirits while others you breathe a sigh of relief that they have left your path!  The card I'm sharing today is for one of my co-workers Wendy who is moving to Tennessee next week as her husband got a job transfer.  I haven't worked with Wendy long but I felt as though we were on the cusp of becoming friends.  She is artistic and can appreciate my love of cardmaking.  We are close in age and have the same build and hair color - folks would often mistake us for sisters!  I'm happy for her but at the same time I know I will miss her.


I first stamped Hero Arts H5312 Silhouette Burst with cocoa ink on white cs.  Using the negative from a die cut circle I sponged Tsukineko pretty petunia chalk ink to give the burst more of a flower-like appearance.  The butterfly from Hero Arts CL383 Antique Engravings was also stamped with cocoa ink on a white cs scrap and sponged with the pretty petunia ink and some Ranger peeled paint distress ink.  The pp "grass" was die cut using a Papertrey ink scalloped border die.  Sentiment is from MSE (My Sentiments Exactly).
Other Materials Used:  Martha Stewart cs, Stampin' Up cs and pp, Michael's pearls, American Crafts buttons

     I would also like to share that my mother-in-law was in the hospital from Mother's Day through yesterday.  She has gallstones and they have already done two procedures to try to remove them (even going as far as transferring her to a nearby urban hospital for the second procedure).  She will have to have another procedure (hopefully the last one!) next Friday.  She is understandably discouraged so any prayers for her quick recovery would be greatly appreciated!   

Thank you so much for stopping by and for all your sweet comments!

Friday, May 6, 2011

See the Flowers Smiling

Quick post today as the sun is shining for the second day in a row and I don't want to miss out!  I watched Shari's technique video on the Hero Arts blog regarding coloring with colored pencils and decided to give it a try.  What I quickly discovered is the quality of your colored pencils really does make a difference in the result.  I don't own very many Prismacolor pencils so I tried using the inexpensive pencils I have on hand - blending the color with a white pencil was difficult and didn't produce as good a result as I had hoped:


I used a bloom from CL495 Blossom Art and did a little masking.  Decided to pop up the flower in the lower left hand corner to give some dimension and applied Ranger icicle stickles to the flower centers.  The sentiment is from CL129 Anytime Messages.
Other Materials Used:  Stampin' Up cs and butterfly dies, Cuttlebug textile embossing folder, Nestie, Michael's pearl

I hope everyone has a fabulous Friday and that you have the opportunity to see a few flowers smiling :)

Thursday, May 5, 2011

Wallpaper Flowers


Another one of my all-time favorite Hero Arts(HA) flower stamps is K5185 Wallpaper Flowers.  I first embossed it in black on a piece of white cardstock.  Then I smooshed an orchid and an olive ink pad on an acrylic block and colored the image by lifting ink from the block with a blender pen.  After trimming the image I matted it on a piece of orchid cs and adhered it to the card front with foam tape.  Clear gems were added to each of the flower centers.  The sentiment is from HA CL129 Anytime Messages.  I plan to give this to my MIL for Mother's Day as I know she likes this color combination.
Other Materials Used:  Stampin' Up cs, pp and ink, Cuttlebug swiss dots embossing folder, Michael's rhinestones, Nesties

This is the first day in several weeks that we woke to blue skies and no rain!!  Even the birds sound happier :)

Have a wonderful day and thanks for stopping by!

Wednesday, May 4, 2011

Where Did April Go?


Have you ever gotten to the beginning of a new month and wondered what happened to the last one??  In my last post I was just hours away from leaving for Paris.  I've been back for three weeks now and in that time have caught up with family and friends (and laundry!), celebrated Easter with loved ones, adjusted to the return of my MIL from her winter stay in the south and have made a few cards to get my creative juices flowing again.

My husband Keith took over 500 photos during our trip!  For someone many affectionately refer to as "the bean counter" I'm impressed with a lot of the subjects he chose to capture:
Look at the gorgeous wisteria covering a residential building in Montmartre:

I really cannot overstate how much I enjoyed the desserts in Paris (good thing we did A LOT of walking every day!):

Rodin's sculpture of "The Thinker" (Touring the gardens of Rodin's museum was an incredible bargain at only 1 euro/person!):


That's me standing in front of Rodin's "Hells Gate" in awe of its size (and wondering if the artist was dropping acid while he created it - LOL!):


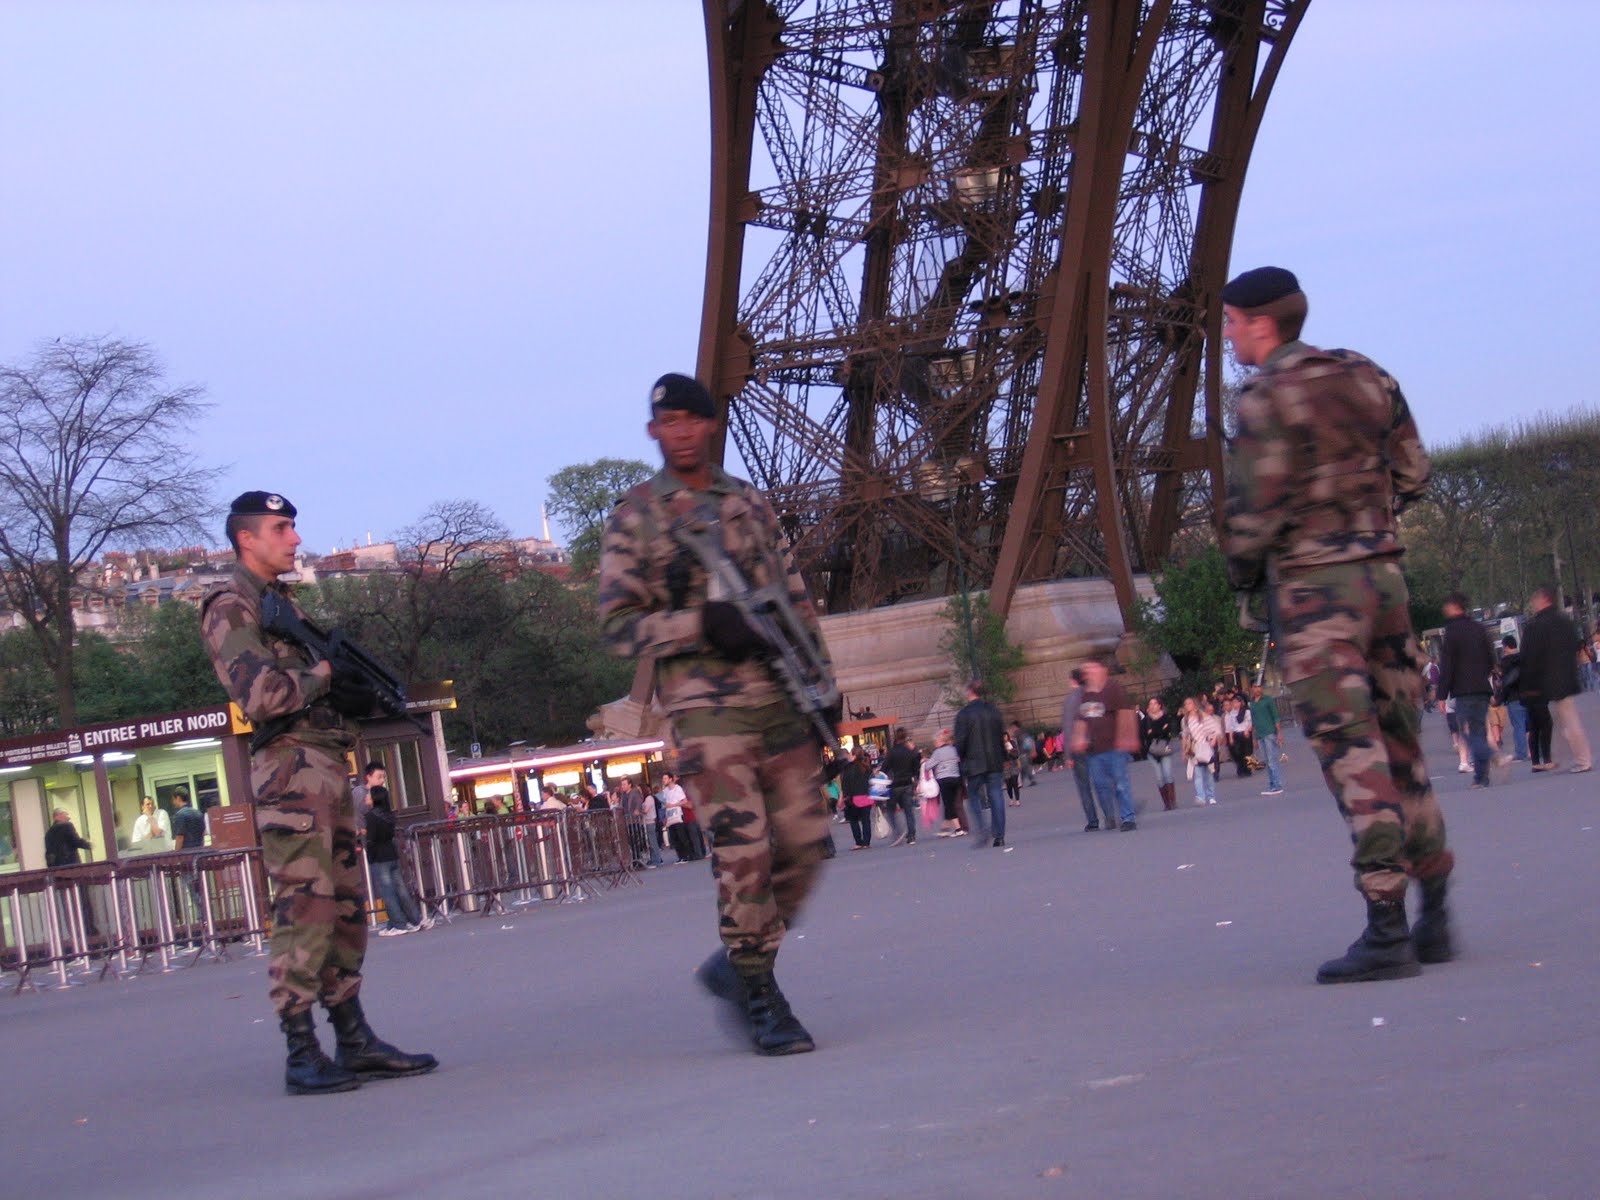
Here's a view of the base of the Eiffel Tower (and a sobering reminder of the times we live in):


Here's the Eiffel Tower at nightfall in all its glittery goodness:

Here's an embarrassing pic of yours truly (he made me do something similar at the Leaning Tower of Pisa!):


You can barely make out the people walking around the top of the Arc de Triomphe.  After paying 10 euros/person to walk over 300 steps to the top (yep, I counted them!) my dh husband who has a heart condition announces he left his nitro back at the hotel!


Not only do I love the Byzantine influence you can see in the architecture of the Sacre Coeur but could the sky be any bluer?????  I haven't seen a sky that blue since we returned home - it's rained here almost every day for 3 weeks :(

I really had no idea how huge the Louvre Museum is - we spent 8 hours there and still didn't see everything!  We spent a lot of time in the Egyptian antiquities section as who knows whether we'll ever be able to safely travel to that part of the world.  Leave it to my husband to notice this statue making a "shadow dog" on the wall!:

And don't you just love ole blue eyes??!!!:

Spent another day touring the palace of Versailles - King Louis XIV sure knew how to live!  I think the gardens alone are larger than the village I live in!:


My husband really has an obsession with fountains (I swear 100 out of the 500 pics he took contain fountains!):

Statues too!:


You just never know when you'll have a celebrity siting in Paris!  Oh wait.......that's just me!:

I love some of these random shots of the river Seine and the streets of Paris:

Leave it to yours truly to sniff out the only scrapbooking store in Paris!:


And finally, I will leave you with a few "What on earth was my husband thinking?!!" shots:


Thanks for stopping by!!